Fix a Leak

Fix a Leak

Table of Contents

Do you have a drippy faucet, an overflowing toilet or an unexplained wet spot in your home?

If so, chances are you have a water leak. It’s not easy to deal with, but it is important and can cause major damage if left alone.

Whether you know the source of the leak or need help diagnosing it, these steps will guide you through how to fix a leaking pipe as quickly and efficiently as possible.

So put on your DIY hat – we’re about to dive into fixing those pesky leaks!

Identifying the Source of the Leak – How to tell where it’s coming from and what materials are needed to fix it

When it comes to fixing a leak, the first step is typically identifying the source.

This can seem like a daunting task, but with the right tools and techniques, it is more than doable.

One way to start is by examining the area around the leak, paying close attention to any discoloration or pooling water.

From there, you can use various materials such as dye testers or moisture meters to pinpoint the precise location of the leak.

Once you know where it’s coming from, you can gather the necessary tools and supplies to fix it, whether that means replacing a damaged pipe or patching up a hole in your roof.

With some patience and a little bit of know-how, you’ll have that leak fixed up in no time.

Leave contact details

Preparing for the Repair – Must-have tools and supplies for the job

When it comes to fixing a leak, having the right tools and supplies is crucial.

Before you start the repair, make sure you have some must-have items on hand, such as a wrench, pipe cutter, plumber’s tape, and silicone sealant.

Without these tools, repairing that pesky leak can be a real challenge.

You may also need to pick up some replacement parts, like a new washer or O-ring.

Taking the time to prepare for the repair can save you a lot of hassle and frustration in the long run.

With a little bit of know-how and the right tools, you’ll be able to fix that leak in no time.

Fix a Leak

Patching the Leak – Step-by-step instructions on how to patch a leak in a sink, pipe, or other plumbing fixture

Patching a leak might seem like a daunting task, but with the right tools and a step-by-step guide, it’s a repair you can easily tackle yourself.

Whether it’s a sink, pipe, or other plumbing fixture, fixing a leak can save you money on your water bill and prevent further damage to your home.

To start, gather the necessary supplies and be sure to turn off the water supply to the affected area.

From there, carefully follow each step in the patching process and you’ll have that leak fixed in no time.

Don’t let a pesky drip bring you down – with a little know-how and determination, you’ll be able to fix the problem like a pro.

Fix a Leak

Testing for Success – Tips on testing the repair to ensure it is successful and watertight

Fixing a leak can be a daunting task for many homeowners, but what’s even more challenging is ensuring the repair is successful and watertight.

After all, the last thing you want is to discover that the leak has resurfaced a few weeks or months down the line.

That’s why testing is crucial to the success of any repair job.

One tip is to conduct a visual inspection of the repaired area for any signs of moisture or seepage.

You can also use a hose to simulate rainfall and see if the fix is holding up.

If you’re unable to detect any issues, it’s always a good idea to keep an eye out for any tell-tale signs of water damage to ensure your repair was indeed a success.

Fix a Leak

Clean Up & Maintenance – The importance of cleaning up after repairs and how to properly maintain your plumbing

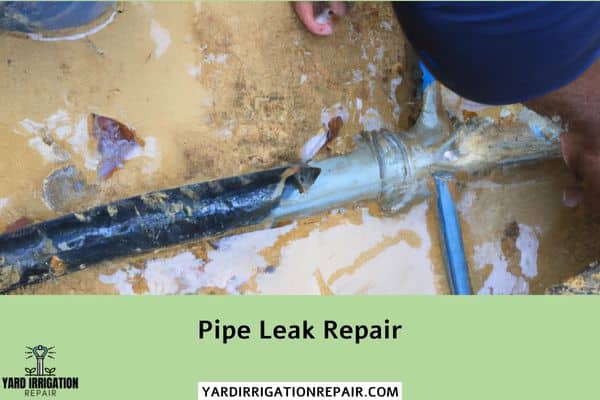
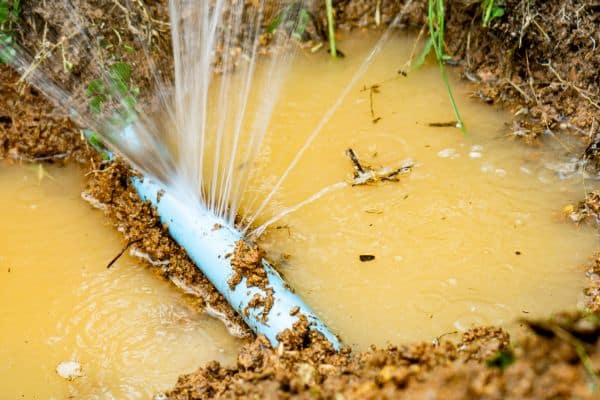
When it comes to fixing a leak in your plumbing, it’s crucial to not only repair the issue but also take the necessary steps to clean up any mess that might have been made.

Failing to do so can result in mold and mildew growth, unpleasant odors, and even water damage.

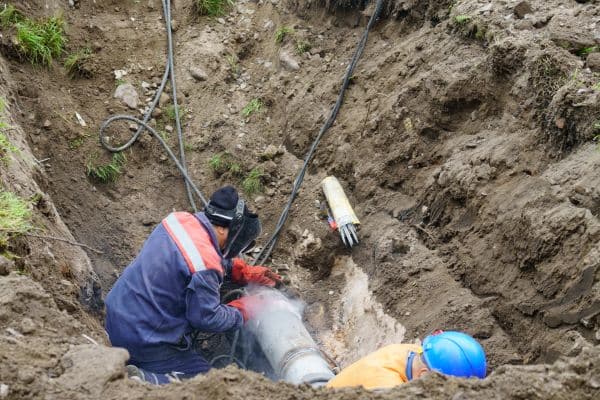
Proper maintenance of your plumbing system can also help prevent future leaks from occurring.

This includes regular inspections, cleaning of drains and pipes, and ensuring that all connections are secure.

By being proactive and taking care of your plumbing system, you’ll not only keep your home clean and free from damage but also save yourself from potentially expensive repairs down the road.

More Articles

Preventative Measures – Taking steps now to avoid future repairs, including regular maintenance checks and monitoring for signs of wear and tear

Taking preventative measures can save you time, stress, and money in the long run.

Regular maintenance checks and monitoring for signs of wear and tear can help identify small problems before they turn into big ones.

For example, fixing a leak early on can prevent water damage and mold growth, which are costly and time-consuming to repair.

By taking proactive steps now, you can avoid the need for major repairs down the road, and enjoy the peace of mind that comes with knowing your home or property is in good condition.

So don’t wait until something goes wrong; start implementing preventative measures today.

Fixing a leak is one of the most common plumbing issues homeowners can tackle.

With the right tools and supplies, it’s relatively easy to identify the source and patch it up quickly and successfully.

Thanks to regular maintenance checks, homeowners can reduce the chance of plumbing emergencies.

Though it may be inconvenient, taking preventative measures now can save you time, money, headache, and stress in the future.

While costly repairs are inevitable when maintaining any home system, a sound knowledge of basic plumbing repair tips gives you everything you need to fix minor problems quickly and efficiently.

More Articles

Table of Contents

Subscribe
to our
blog updates

Articles you may like to read

Palm desert, California